Our biggest project yet, we started out by framing the bench seat in the shower. We then covered it with plywood, and got to work on filling the space in between the studs so we could shim the wall. We then added our waterproofing membrane to prepare for the hot mop. Once we finished that, we installed our HardieBacker on the walls, curb, and bench of the shower. We applied the mesh tape in between the seams and laid thinset to hold it. We then pointed a laser level to install our level board and got to work on cutting the tile to lay down our pattern. Our teacher had us pick different tile for the walls, bench, and floor. We used thinset to adhere the tiles to the board and spacers to keep equal distance between tiles. Once all of the tiles were placed down, we applied a final layer of thinset and wiped everything down, letting everything dry.
Bath & tileSep 2023
Los Angeles Trade Tech


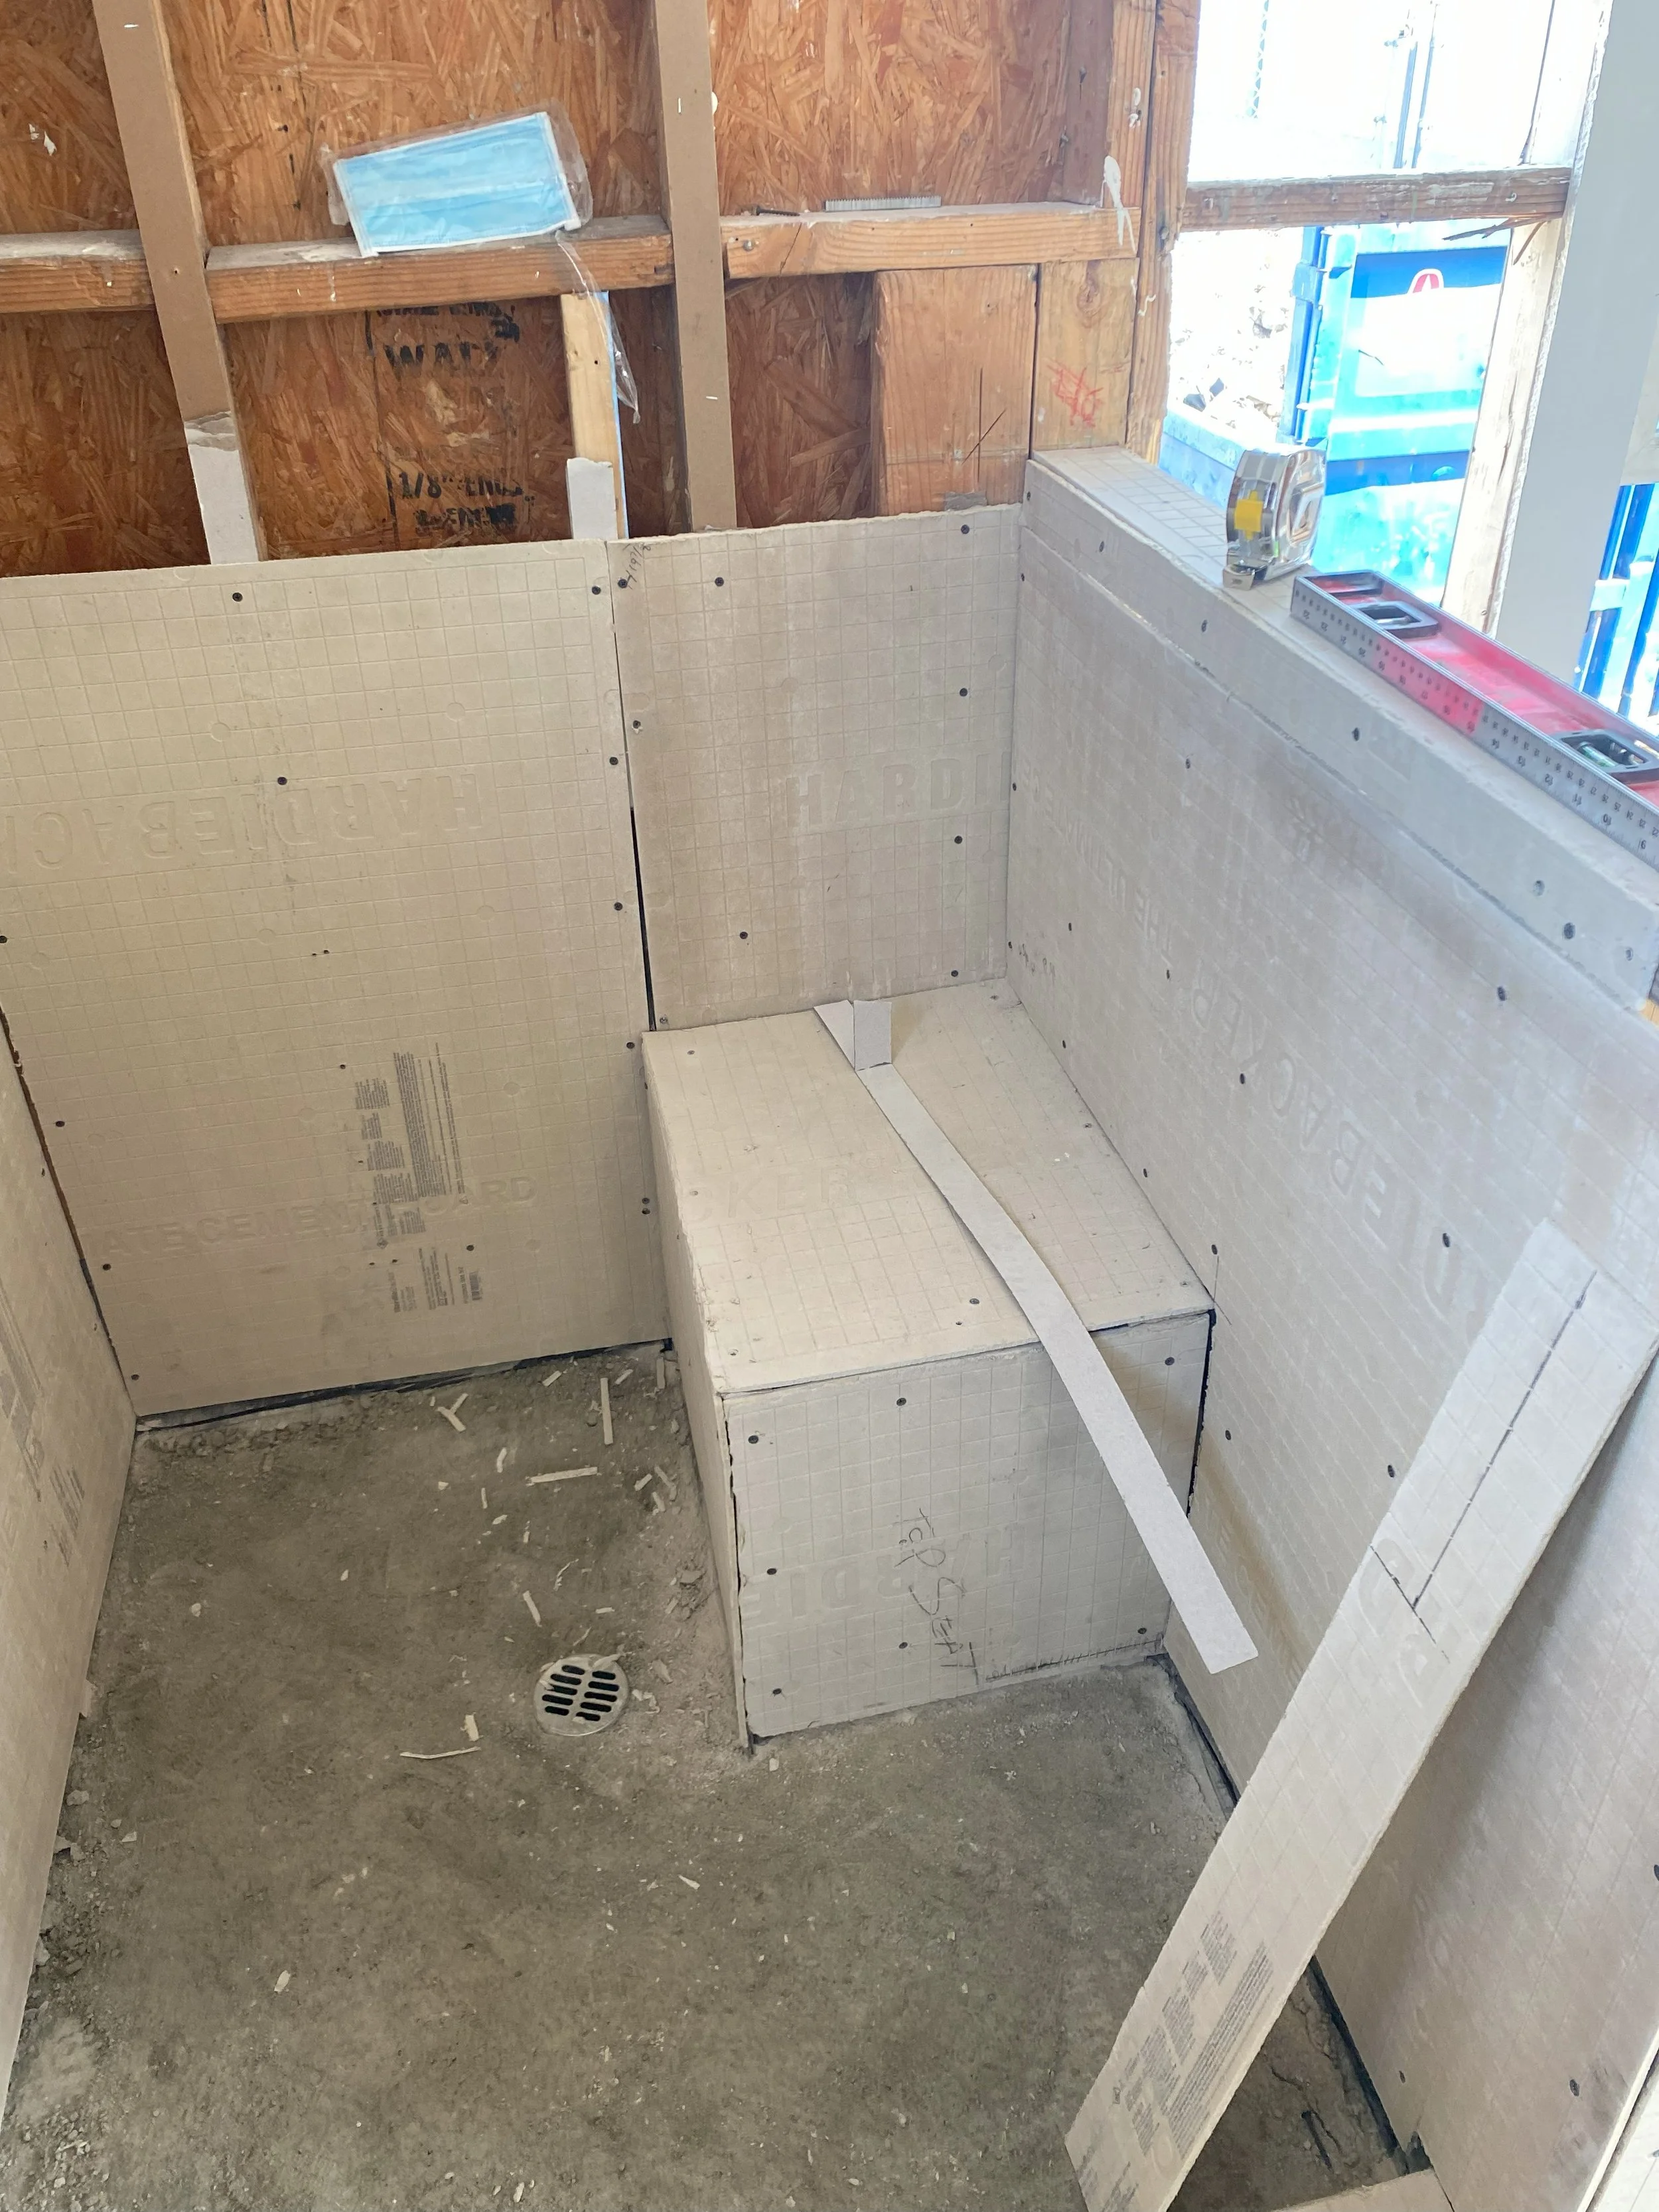


I had a lot of fun with this build, but I also learned a lot—specifically with time management and learning how not to get too sucked into one part of the job. Another thing this project taught me was how important it is to get extremely accurate measurements because there is no wiggle-room with tile. Please also note that the floor was not finished with thinset due to time constraints.
More of The Builds


Siding & Stucco
Roofing

Cabinetry

Flooring
Drywall & Molding